on

Verify the camera position
Move/tilt the camera slightly to change the field of view.
- When moving the camera closer, the field of view becomes narrower.
- When moving the camera away, the field of view becomes wider.
- Rotating the camera (left/right) will allow you to see if the global reference is in the field of view or not.
TIPS: Close Knee3D Assessment and open NDI track software to ensure that the field of vision (volume) of the NDI camera allows you to see the base of the treadmill.

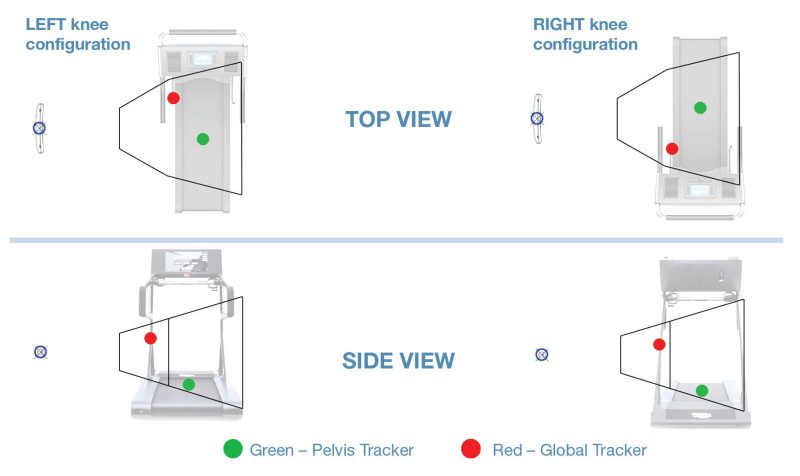
Optimizing NDI camera positioning
The NDI Track software should be used before starting each assessment to optimize the camera positioning to help keep the trackers in the camera’s field of view and minimize the need for adjustments during the assessment.
Two camera perspectives relative to a treadmill are shown below. The pyramidal outlines show the camera’s field of view: The top perspective shows the bird’s-eye view, and the bottom shows the side view.